How-to
Kitchen Drawer Organization Ideas: A Zone-by-Zone Guide
This article may contain affiliate links. Please read our Affiliate Disclosure policy.
Quick answer: To organize kitchen drawers, empty each one, get rid of duplicates, and give every drawer one job. Put cooking utensils in the drawer nearest the stove, cutlery near the dishwasher, and knives and peelers near your prep space. Then measure each drawer and add dividers or trays that fit, so nothing slides around when you open it.
A drawer is only organized if you can find what you need in a few seconds. That depends less on the products you buy and more on where each drawer sits in your kitchen and what you let live in it.
Step 1: Empty and edit
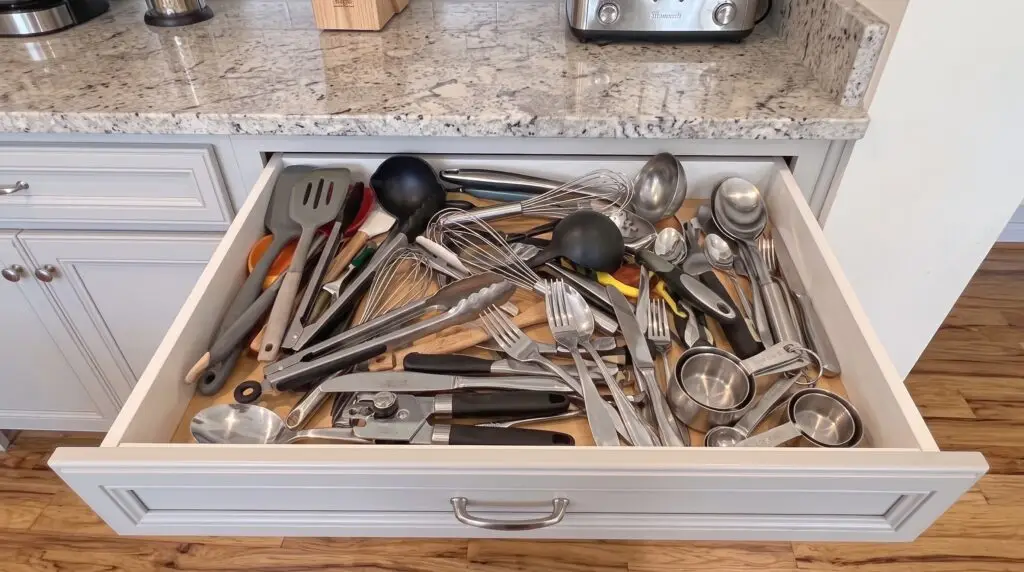
Take everything out of one drawer at a time. Sort into keep, move to another room, and donate or toss. Look for duplicates (how many whisks do you really use?), broken tools, and takeout extras. If you have a catch-all “junk drawer,” decide now which items belong in it and which do not.
Step 2: Match drawers to zones
Think about where you stand when you do each task:
| Zone | Where it sits | What lives there |
|---|---|---|
| Cooking | Nearest the stove | Spatulas, ladles, tongs, whisks |
| Cleanup | Nearest the dishwasher | Cutlery, serving spoons |
| Prep | Near the main counter | Knives, peelers, measuring cups and spoons, can opener |
| Food storage | Near the fridge | Foil, wraps, bags, lids |
| Linens | Near the sink | Dish towels, oven mitts |
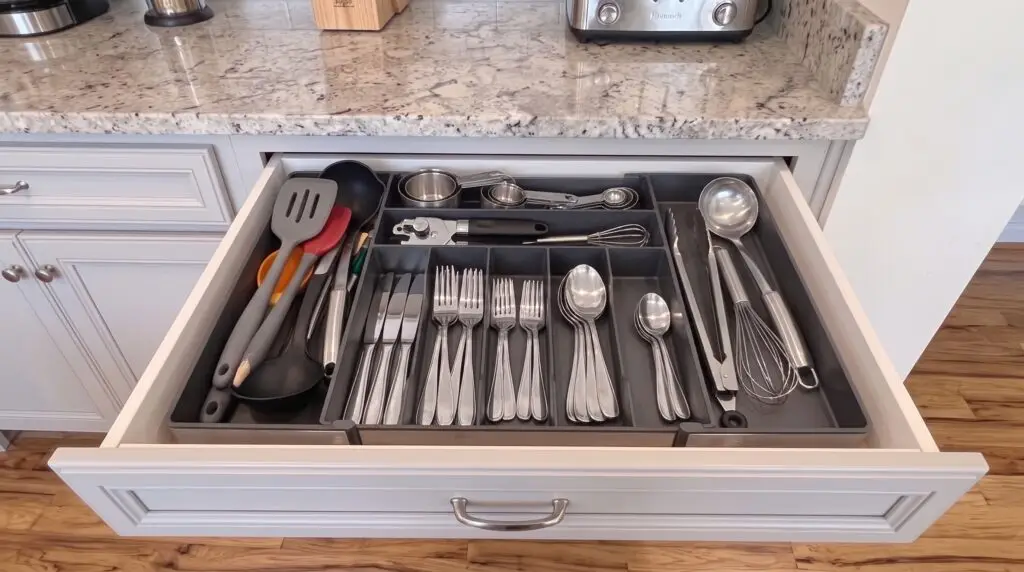
We have used the drawer organizer to further organize the items in each drawer.
Step 3: Measure each drawer
Measure the inside width, depth and height. You can use the table below as a guide, write the measurements down before you shop.
| Drawer | Width | Depth | Height |
|---|---|---|---|
| Cooking utensils | [Fill in your measurements] | [Fill in your measurements] | [Fill in your measurements] |
| Cutlery | [Fill in your measurements] | [Fill in your measurements] | [Fill in your measurements] |
| Prep tools | [Fill in your measurements] | [Fill in your measurements] | [Fill in your measurements] |
| Wraps and bags | [Fill in your measurements] | [Fill in your measurements] | [Fill in your measurements] |
Step 4: Set up each drawer
Cutlery and organized utensil drawer
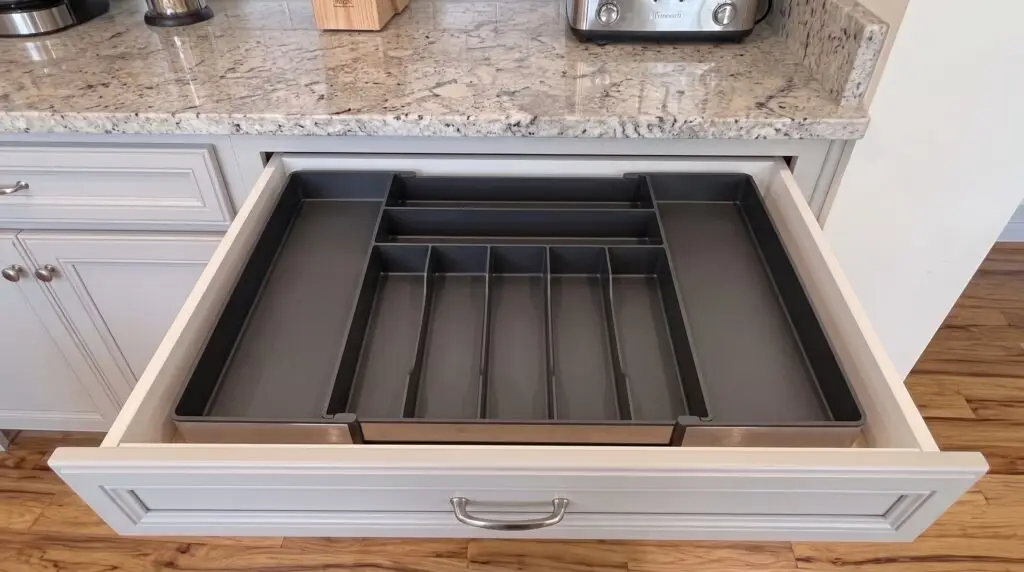
Use a tray with a compartment for each type. A tiered or expanding tray gives you more room in a shallow drawer. Keep daily-use pieces in the front.
Cooking utensil drawer
Group long tools (spatulas, ladles) in one section and short tools (whisks, peelers) in another. A drawer that is too shallow for upright tools works best with tools laid flat in a divided tray.
Knife drawer
Use an in-drawer knife block or a tray with slots so blades are covered and not touching each other. Keep it away from where small children can reach.
Wrap and bag drawer
Stand boxes on their side, or use a small dispenser tray. Group by size, and keep lids with their containers in a bin. See our pots and pans guide for lid ideas.
Deep drawers
Use pegs or tall dividers so pots, bowls and storage containers stay upright instead of sliding. Add a non-slip liner.
The junk drawer
Give it one small tray set for batteries, tape, scissors and takeout menus. Everything else goes somewhere else.
Drawer divider options
- Expandable trays: quick, fit most widths, can slide.
- Tension dividers: adjust to the exact depth, good for custom layouts.
- Modular bins: flexible, but check that they fit together without gaps.
- DIY: foam board or cardboard dividers to test a layout before you buy.
Choose renter-friendly options that do not need screws if you rent. See our renter storage guide.
Common mistakes
- Buying organizers before measuring
- Keeping duplicates and broken tools
- Putting the cutlery drawer far from the dishwasher
- Letting the junk drawer take over a second drawer
Our picks for kitchen drawer organizers
We have selected some useful kitchen drawer organizers for you to choose from.
| Product type | Best for | Not for |
|---|---|---|
| Expandable cutlery tray 9 slots expandable Expandable with knife block Expandable mesh design | Standard drawers | Very shallow drawers |
| Adjustable tension dividers 6 packs adjustable bamboo Inserts and labels, adjustable and expandable | Custom layouts and deep drawers | Drawers with curved sides |
| Modular bins 5pcs 3 by 3 25 packs clear plastic | Small gadgets and junk | Drawers with odd widths |
| In-drawer knife block In-drawer knife holder 9 inch bamboo 16 pcs with scissors slot 2 in 1 with clear lid | Safe knife storage | Drawers under 3 in. deep |
| Non-slip drawer liner Tear-resistant and non-adhesive Nice designs and non-adhesive Floral designs and non-adhesive | Every drawer | None |
Quick answers
What is the best kitchen organizer for drawers?
The best organizer is the one that fits your measured drawer and your tools. For most kitchens that means an expandable tray for cutlery, adjustable dividers for utensils, and small bins for gadgets. Measure width, depth and height before you buy, and test a layout with cardboard first.
What should be kept in kitchen drawers?
Keep things you use often and that suit a drawer: cutlery, cooking utensils, knives, measuring tools, wraps and dish towels. Heavy items belong in lower cabinets, and rarely used tools belong up high or out of the kitchen.
What are some creative ways to organize drawers?
Use tension dividers cut to size, an in-drawer knife block, tiered trays for cutlery, and a small bin for loose lids. A cardboard mock-up lets you test a layout before buying anything, and labels help everyone put things back.
How do I organize a kitchen drawer?
Empty it, remove duplicates, and give the drawer one job. Measure it, choose a tray or divider that fits, and group like items together. Keep the most-used items in front and check the layout again after a week.