How-to
Small Pantry Organization: A Step-by-Step Guide
This article may contain affiliate links. Please read our Affiliate Disclosure policy.
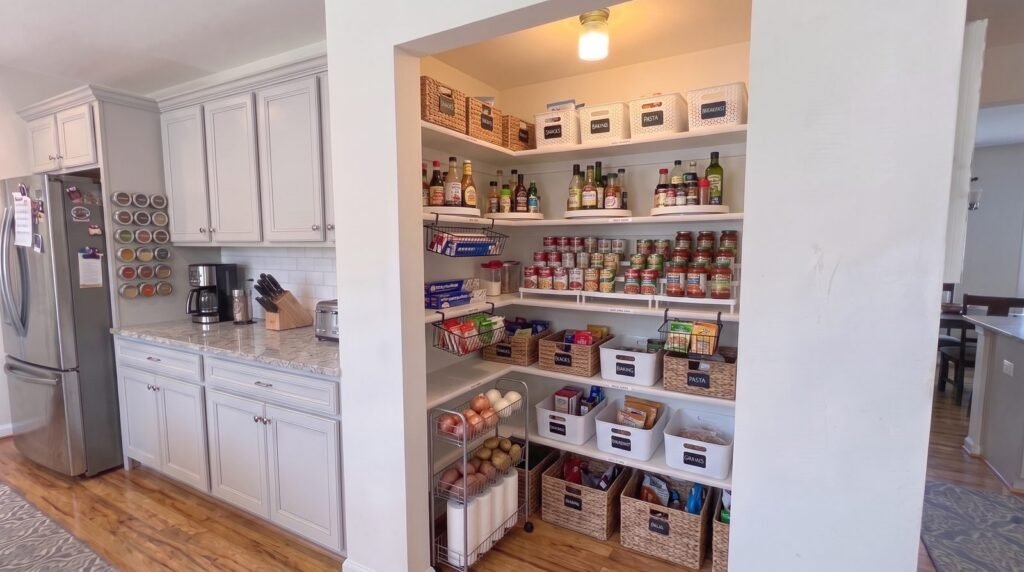
Quick answer: To organize a small pantry, empty it, toss what is expired, sort food into zones (breakfast, baking, canned goods, grains and pasta, snacks, oils and sauces, backstock), and put the things you use daily at eye level. Add vertical space with risers, turntables and bins, label what you decant, and rotate older food to the front. No door for a rack? Use shelf-top risers, shelf-edge baskets, a slim cart or a wall rail instead. Plan about 2-3 hours or more time if your pantry is bigger.
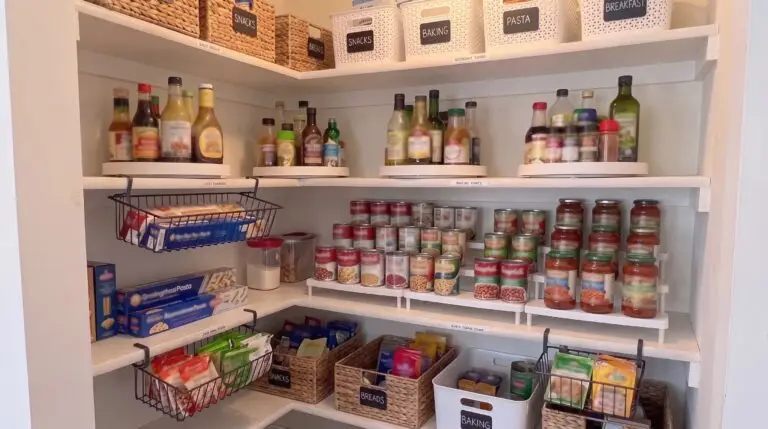
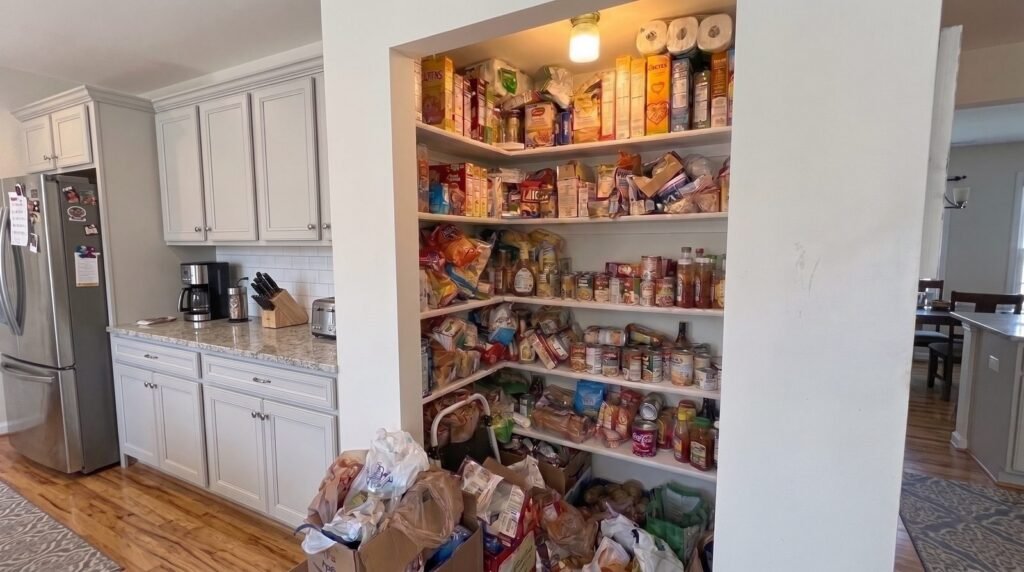
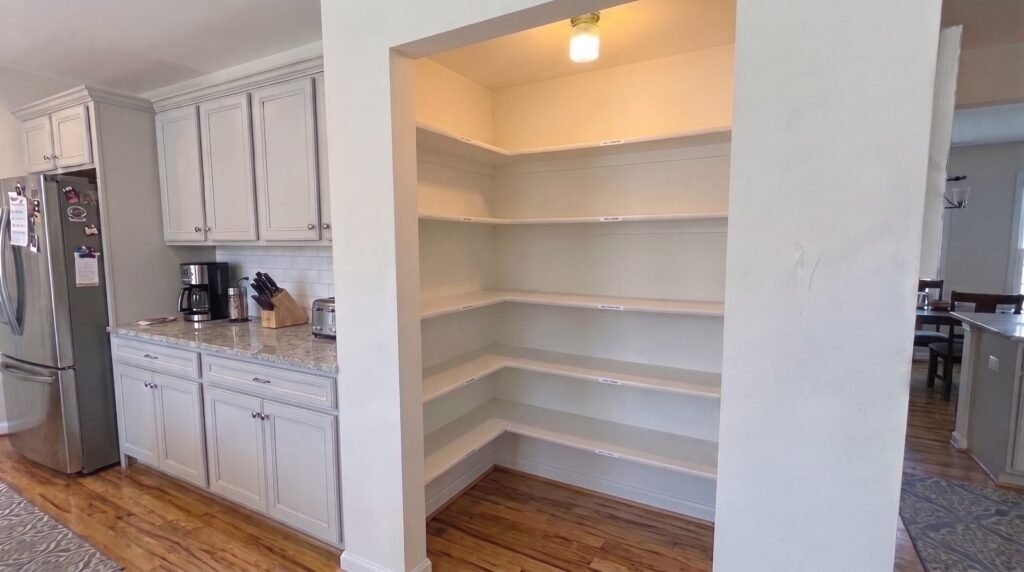
A small pantry does not need to be pretty to work. It needs to let you see everything at a glance, so you stop buying duplicates and stop losing food in the back. This guide uses an open, L-shaped corner pantry with no door, and it is the hardest one to keep tidy: everything is visible from the kitchen, and there is nowhere to hang a door rack.
What you need before you start
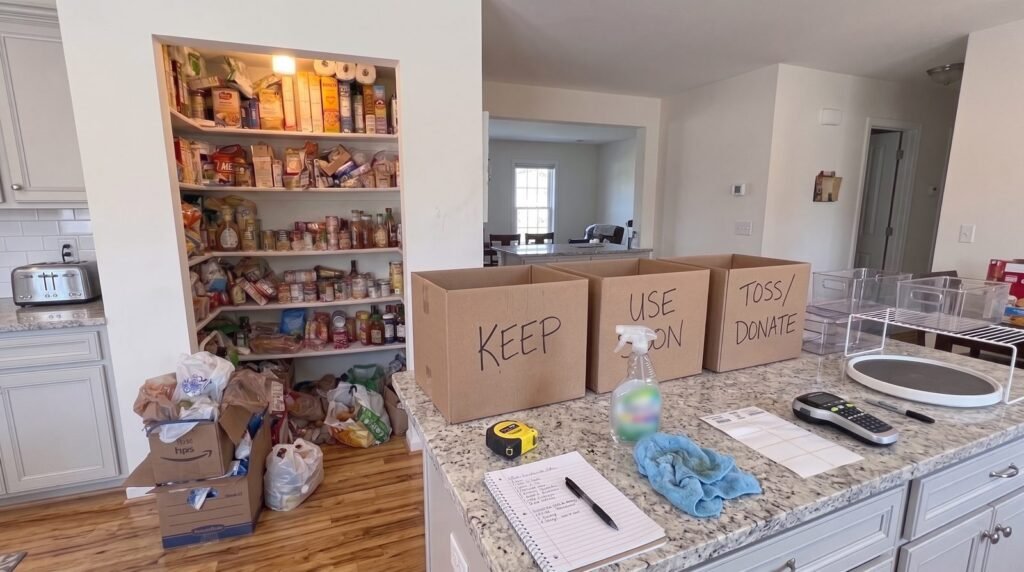
- A clear table or counter for sorting
- Three boxes or bags: keep, use soon, toss/donate
- A tape measure and a notepad
- A damp cloth and cleaner for shelves
- Labels and a marker (or a label maker)
- Optional: risers, bins, turntables, shelf-edge baskets (see our picks below)
Step 1: Clear the floor, then empty the shelves
If bags and boxes are piled on the floor, start there. Unpack them, put perishables away, and decide where each thing will live before you put it back.
Then take everything off the shelves. Check dates and look for damaged packaging, stale snacks and anything you know you will not eat. “Best by” dates are usually about quality, not safety, so use your judgment and the USDA’s guidance on date labels. Donate unopened items you will not use if your local food bank accepts them.
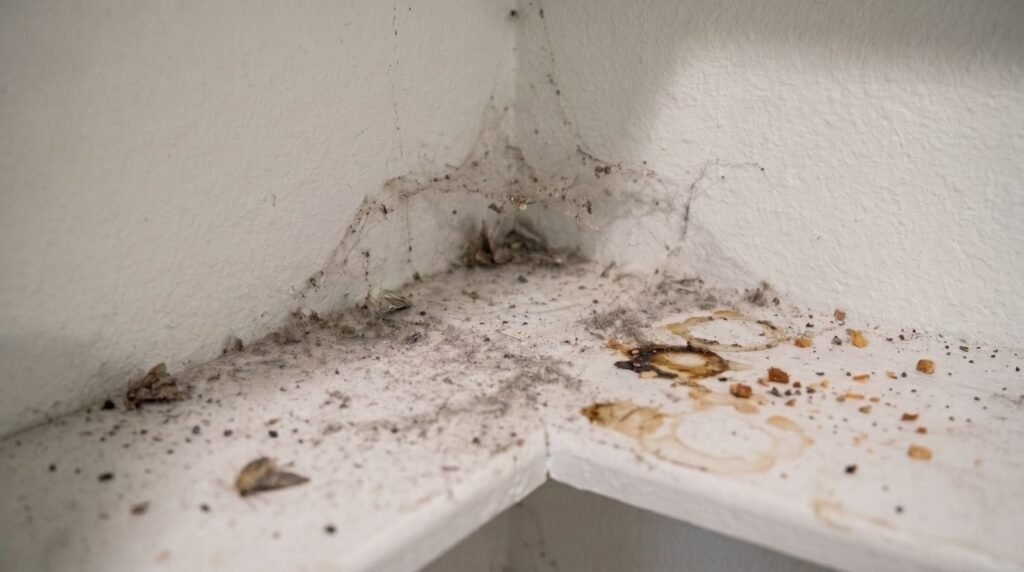
Wipe the shelves while they are empty, see how dust, dirt and dead moths when cleared the area.
Step 2: Measure your shelves
Write down the width, depth and height of each shelf run. In an L-shaped pantry, measure each wall separately and note the corner. This stops you from buying containers that do not fit.
Example of the measurements list in the following table.
| Shelf | Width | Depth | Height between shelves |
|---|---|---|---|
| Top | [Fill in with your measurements] | [Fill in with your measurements] | [Fill in with your measurements] |
| Upper middle | [Fill in with your measurements] | [Fill in with your measurements] | [Fill in with your measurements] |
| Lower middle | [Fill in with your measurements] | [Fill in with your measurements] | [Fill in with your measurements] |
| Bottom | [Fill in with your measurements] | [Fill in with your measurements] | [Fill in with your measurements] |
| Floor space | [Fill in with your measurements] | [Fill in with your measurements] | [Fill in with your measurements] |
Step 3: Make seven zones
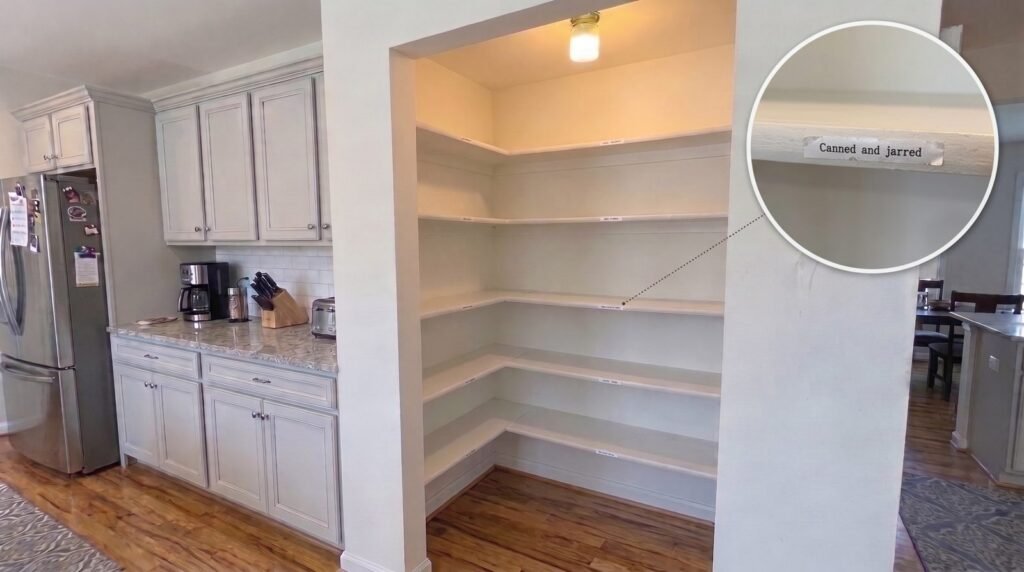
Group like with like, then give each group a home. These are the seven zones we use:
- Breakfast: cereal, oats, pancake mix
- Baking: flour, sugar, baking powder, chocolate chips
- Canned and jarred: beans, tomatoes, soups
- Grains and pasta: rice, pasta, quinoa
- Snacks: the things people grab without thinking
- Oils, sauces and spices: the cooking basics
- Backstock: extras you bought on sale
Put daily-use zones at eye level and within reach. Heavy items (cans, bags of rice) go on lower shelves. Backstock goes on the top shelf. Give non-food items, such as paper towels and shopping bags, their own spot so they do not mix into your food zones.
These are just an example of the groups, you can add on yours.
Step 4: Use vertical space
In a small pantry, the empty air above your food is your best storage.
- Shelf risers let you see two rows of cans or jars.
- Turntables help in the corner and on deep shelves, so nothing gets lost behind a bottle.
- Stackable bins keep snacks, bread and packets together and pull out like a drawer.
- Shelf-edge baskets hang from a shelf and hold foil, wraps and small bags.
No door? Do this instead of an over-the-door rack
An over-the-door rack is a great small-pantry trick, but many pantries, like an open corner alcove, have no door. These options give you the same extra storage:
- Tiered shelf risers for spices. A 2- or 3-tier riser on a shelf shows every jar at once.
- Shelf-edge hanging baskets. They clip or hang under a shelf and hold foil, wraps and small packets.
- A slim rolling cart or narrow shelf beside the opening. A cart that fits next to the pantry can hold spices, snacks or oils.
- A wall rail or hooks on a nearby wall. Good for bags, aprons or a light basket. Use screws only if you own the home or your landlord allows it; otherwise use removable hooks rated for the weight.
- Magnetic spice tins or a magnetic strip on the side of a metal fridge or cabinet. Test with a magnet first: not every stainless steel surface is magnetic.
- Matching bins and labels. With no door to hide it, a pantry that is visible from the kitchen looks calmer when containers and labels match.
A doorless pantry also leaves food exposed to kitchen dust, sunlight and cooking splatter. Airtight containers help protect dry goods such as flour, sugar and cereal.

Step 5: Decant only what you use fast
Clear containers look neat, but they cost money and take time. Use them for things you open often: flour, sugar, rice, pasta, cereal and snacks. Keep the original box or bag for instructions and use-by dates. You can tape a cut-out of the label to the inside of the container (currently using DYMO label manager which is useful for home and office, other options are provided at the end of the article).
Free printable
Pantry check and labels
Keep track of your staples, note what is running low, and label your jars and shelves. Print it at home on Letter or A4 paper.
Step 6: Label everything
Label the front of each container and the edge of each shelf if you share the kitchen. Include the date you opened or refilled something if it helps you rotate it.
Step 7: Keep the floor clear and rotate
- First in, first out: put new groceries behind older ones.
- Unpack groceries the same day, so bags and boxes do not pile up on the floor.
- Store potatoes and onions in ventilated containers, away from the food zones.
- Do a monthly 10-minute check for items that are running low or expiring soon.
- Keep a list of what you have. Our pantry inventory printable makes this easy and stops you buying a fifth jar of cumin.
Small pantry types and what works
- Open L-shaped corner pantry (no door): use turntables in the corner, risers on shelves, shelf-edge baskets and a slim cart. Keep the floor clear.
- Closet pantry with a door: add an over-the-door rack and use adjustable shelves.
- Single cabinet: use risers and a turntable. Keep a “zone” per shelf.
- Shallow wall pantry: use clear bins and front-facing shelves so nothing hides behind anything else.
Common mistakes
- Buying containers before measuring
- Decanting everything, including things you rarely use
- Putting heavy items on a high shelf
- Leaving bags and boxes on the pantry floor
- Skipping labels, so the system falls apart in a month
Our picks for a small pantry
We have included a few variations of each pick below, so you can choose the one that suits your pantry best.
Quick answers
How can I easily organize my small pantry cupboard?
Empty it, wipe the shelves, and group food into zones. Put the things you use every day at eye level, add a riser or turntable for depth, and label what you decant. Use older items first by placing new groceries behind them. Most small pantries take an afternoon.
What is the best way to organize my pantry?
Sort by category, give each category a home, and make everything visible. Use clear containers for items you open often, risers for cans, and bins for snacks. The best system is the one you will keep up, so keep it simple.
What are the 7 pantry zones?
We use breakfast, baking, canned and jarred, grains and pasta, snacks, oils and sauces, and backstock. Other people use different groupings. The point is to keep like items together and put the daily-use zones at eye level.
How can I organize a deep, narrow pantry?
Use pull-out bins or turntables so you can reach the back, and keep the front row for daily items. Store backstock behind or on the highest shelf. Label bins on the front, and measure depth before you buy anything.
How do I organize a pantry with no door?
Skip the over-the-door rack and use shelf-top risers, shelf-edge baskets, turntables, a slim rolling cart or a wall rail nearby. Use matching bins and labels so the pantry looks tidy from the kitchen, and store dry goods in airtight containers.
Sources
- USDA FSIS: Food Product Dating (what date labels mean)
- USDA FoodKeeper (how long foods keep in the fridge, freezer and pantry)